SELF-SUPPORT PADDLING - GEAR & LISTS

So, you're preparing for a 3-day overnighter in the winter/spring on the Cumberland Plateau. The liberating feeling of having everything you need to stay warm, dry, comfortable, nourished, and generally content is one of the more satisfying and inspiring sensations you can have in the outdoors. In our increasingly distracted and rushed lives, these periods of simplicity of focus and existence will prove more and more critical to our mental health and well-being. You're beginning the rewarding process of self-sufficiency, if only for a few days, and it will have implications that bleed into other parts of your life. It's all about being intentional, resourceful, and seeking continuous refinement in process. The better you get at this, the less you'll bring, the lighter your load, and the more you'll enjoy every step along the way. It's not about the gear, it's about freeing up periods of time that you would normally be in a hurry to get to the take-out car, or back into town for dinner, and re-allocating them towards watching the arc of the sun or moon across the sky, to listen to the chatter of golden beech leaves sizzling in the wind, feeling a thick bed of moss under your bear toes, or sitting still to observe the silence of a wild moment that was here before you and will still be, long after your departure. The gear merely enables these fleeting moments we don't get enough of anymore. So don't get overly focused on stuff - we will undoubtedly need some gear, but the experiences are what we're ultimately after. Your process will only undergo as much refinement as your schedule will allow practice. Refinement is a result of learning from mistakes, adapting to unexpected conditions, and sharing our experiences with one-another.
NEED-BASED GEAR SYSTEMS
I like to look at gear in terms of needs. It's a more holistic way of considering the equipment we'll need for any given trip, and helps us in avoiding stuff we don't need. Are you familiar with the old adage? - "it's better to have something and not need it, than to need some thing and not have it." Well, I'm going to seriously part ways with that expression. Bringing too much stuff stresses the handling of your boat, and enslaves you to stuff instead of liberates you from it. If the experience is what we're after, we can't compromise it by bringing everything under the sun. Only having what you actually need, and making sure that each piece of equipment is the exact right tool for the job allows you to move quickly, lightly, and freely. In the event of the unexpected, our resourcefulness and attitude is what allows us to survive, not stuff. I break needs into the following categories:
Shelter/Sleep
Warm/Dry
Nourishment/Hydration
Health/Safety
If an item does not meet these needs, it is not necessary. Moreover, it's rare that one single item will meet any one need completely on its own; rather, a combination of items will be required to meet each need. We wish to avoid redundancy and overkill in creating a system to meet each need. Also, any time an item serves multiple purposes within a system or even carries over into another need, that's called double-duty. For example, if I can wear my river shoes at camp and not have to bring an extra pair of shoes for camp, that would be double duty. To keep my feet dry in my wet shoes, a pair of gore-tex oversocks will allow me to use my river shoes both on the river and at camp, for a few extra ounces of total weight. Understanding our needs allows us to engineer a simple, elegant system that meets those needs with minimal weight, space, and complexity. Let's look at the needs more closely, and the gear that will help us meet those needs.
SHELTER/SLEEP
I need somewhere to sleep that keeps me warm, dry, comfortable, and protected from the elements as well as insects and other threats.
Shelter - there's a few options here. Below is a list of styles, with their strengths and weaknesses:
Tarptent ProTrail - 26 ounces - watch out, some of these require trekking poles! Or you can purchase a pole for many of them.
Tent - Tents offer the most protection. They add a fair amount of warmth, cut the wind well, and keep unwanted insects and other biological nasties out of your space. They also keep sand out of your sleeping area. The downsides are that they can be heavy, and require a fair amount of space to set up. I also can't understate the need for your tent to effectively ventilate condensation that develops inside the tent from your breathing. Pints of water can be breathed into the air from one night of sleeping, and you want to know that all that moisture is able to leave the tent. Ventilation ports at the top of the fly really help with this. Otherwise the temperature will be lower in the tent and you'll be damp if not wet in the morning. Waking up to condensation all over you, your bag, and your tent isn't pleasant. A one-person tent should be under 3 lbs, and a two-person under 4 lbs. One-person tents can be found as low as 24 ounces. Look at reviews and avoid tents that sound like they build up condensation. Most effective 3-season tents that are of the caliber we're looking for tend to be almost fully mesh screening other than the floor and lower walls, and have a silicon-impregnated nylon rain fly. This keeps the tent dry, breaks the wind, and allows the tent space to warm, all the while breathing that condensation out of the tent thanks to all the mesh. With the increase in tick activity and tick-born illnesses of late, if they're out, I'm using a tent. Tents require the most space for set-up, which can be problematic in rough terrain where developed sites aren't available. Some tents even can be set up without the screened in component, allowing you to just bring the poles and the fly for a bomber tarp configuration. While this is nice, the weight savings aren't always huge, since the screen-house portion weighs the least. Still, it may be an ideal application in certain conditions.

Bivy - A bivysack is essentially a waterproof (sometimes breathable) shell for your sleeping bag. Sometimes they have some type of design to where a pole or cord keeps the fabric off of your face. These can be light, but can often weigh as much as a one-person tent. Theres no storage space in these, and they can be a little tight. They usually pack smaller than a tent, which is a clear advantage, but make sure the weight/cost savings are worth the loss of functionality from a tent. This can be a great option, and pairs well with a minimalist, ultralight tarp. They also require the smallest space to set up, which is good if you aren't sure you'll have much room at your campsite. However, that means you won't have any extra room to keep other stuff in the "tent" with you, which may or may not be a problem. Since you have dry bags, it shouldn't be an issue keeping other things dry.
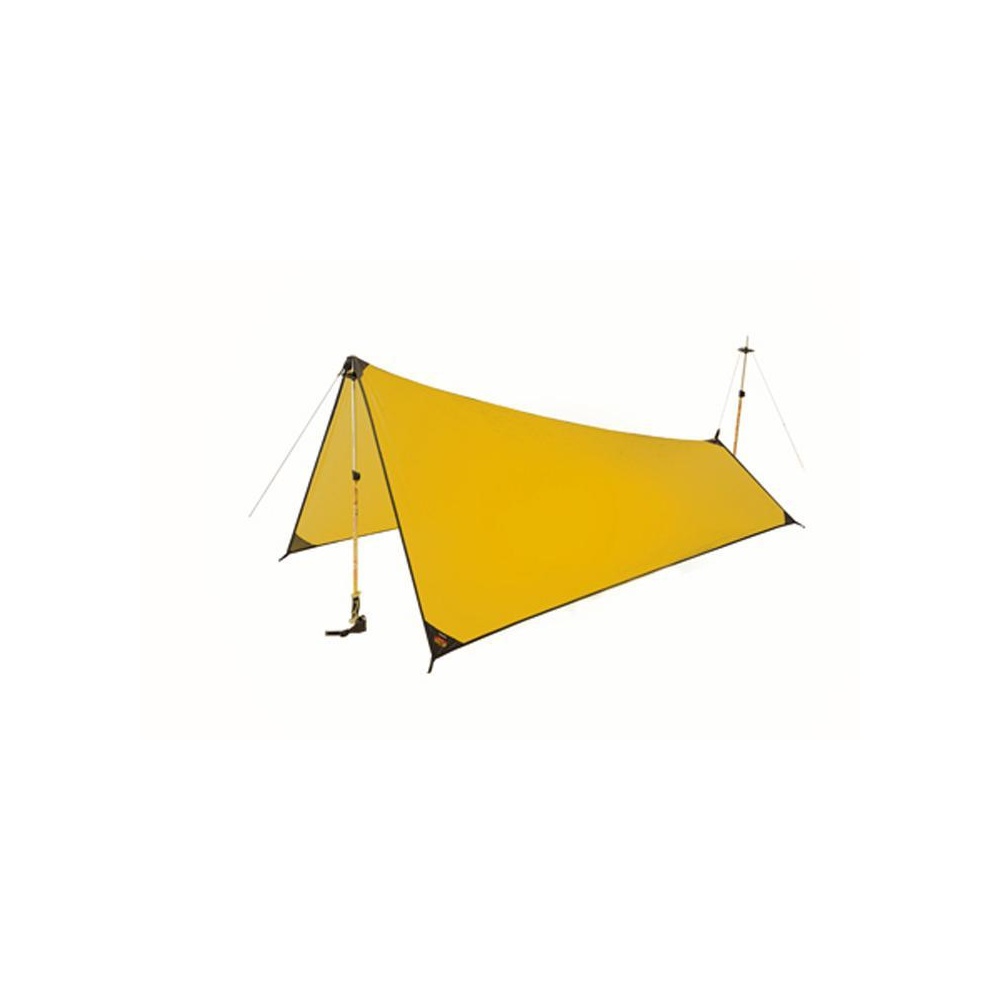
Tarp - Tarps can serve as an incredibly light, compact shelter, and are versatile as far as the different ways you can set them up and what they can be used for. On a paddling trip, a 4-piece breakdown works well as poles, or some sticks can work just as well. Tarps keep you out of the rain, cut some of the wind, and allow your sleep space to breathe and not build up condensation. They pack up very small in your drybag as well. The space required is less than a tent as well. Tarps can also be used as a cook-shelter or hang-out during a storm, or as a kitchen floor tarp for keeping your kitchen sand free and organized. The big drawback to tarps is that they take practice to set up. Don't bring a tarp without having practiced setting it up. Prevailing winds, humidity, and other factors will affect HOW you set them up. That said, I love my tarp, and at 7 ounces, as long as I'm not worried about bugs, it's a great option! For the tarp to weigh as little as this, you'll need to get a tarp made from silicon-impregnated nylon (sil-nylon). Cuben fiber is even lighter, but it's outrageously expensive. For a one person tarp, DO NOT go smaller than a 5 x 7 foot size. I have that size, and while adequate, you won't want to go smaller. 8 x 10 is a great two person size.
Hammocks - I'm not a hammock guy, though I admire the appeal. They can be effective in weight, compactness of storage, and set-up, but they do sleep a bit colder. Sleeping on the ground with a sleeping pad allows you to warm up the layer of air under your body. In a hammock, that's a lot harder to do. In short, I'm not very experienced with hammocks, and will refrain from commenting too far. My favorite appeal offered by the hammock is that you don't need a level, flat surface to set up, and that is quite a benefit. Just make sure you've done a cold night or two and felt comfortable before you bring one on a river overnighter!
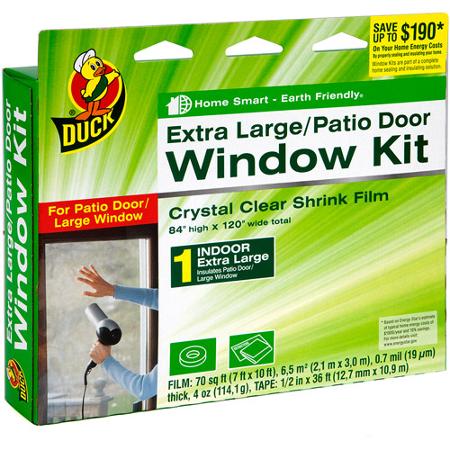
Groundsheet - If you use a tent or a tarp, you'll need a groundsheet. Groundsheets protect the tent floor from punctures, as well as your sleeping pad, and provide a barrier between you/your pad and the ground if you're sleeping under a tarp. Groundsheets are made for each tent, but annoyingly are usually sold separately, sometimes to the tune of $75 or more. A much cheaper and lighter alternative is to make your own out of Tyvek or Polychryo material. Tyvek is pretty easy to find at a local hardware store, but I'm a bigger fan of polychryo groundsheets. These can be bought from backpacking websites, but I prefer to get two for half the price you'd pay online by going to the hardware store. Go to the windows/doors section, and find a patio door/window insulation kit. It's a see-through, shrink wrap plastic film used for insulating windows and doors. It's usually around $7-10, and has enough material to make two of them. They don't last as long as real groundsheets, but almost weigh nothing, pack incredibly small, and can be cut to fit your needs. Make sure to get them big enough - the ones I bought were 84" x 110".

Sleeping Bag - This is one of the critical pieces of gear! Mummy bags keep you the warmest, as they reduce the amount of air between you and the inside of the bag that has to be warmed up. Considerations are weight, pack size, temperature rating and fill rating.
Temp Rating - For winter/spring trips on the Cumberland Plateau, I recommend a 20-30 degree bag. If you are consistently colder than your friends, don't go above 20. If you're in shorts regularly when your friends are bundled up, you might get away with a lighter bag. The ratings are subjective, so read reviews.
Weight - For the given temperature rating, no bag should weigh more than 3 lbs. I have a 30 degree bag that is 1.2 lbs, and a 20 degree bag that is 2.3 lbs.
Pack Size - The bag needs to be compact. If it fits down to the size of a 32 oz. Nalgene bottle, that's a small bag! Remember you'll need to fit it, and many other things, behind your seat in your creekboat. For compactness AND weight, you MUST use down insulation! The only down-side to down is that if it gets soaked and clumps together, it's useless. Synthetic frankly doesn't do much better though, and the massive increase in weight and size synthetic introduces to the situation just isn't worth it. Keep your sleeping bag dry in your boat, and dry and secured at camp, and you're good!
Fill Rating - So Fill-rating is way the quality of the down is represented. The number represents how many cubic inches of volume that down from that bag will fill. The higher the number, the better. Many bags are 600 or less, but I highly recommend you go for at least 750 (I don't go below 800). This is what keeps you warm, so shop around and find a deal on at least 800 fill.
Here's what I have:
For warmer trips - North Face Beeline, 30 degree, 900 fill, 19 ounces, packs to the size of a large Nalgene
For colder trips - Sierra Designs Zissou, 20 degree, 800 fill, 37 ounces, packs a little bigger. I also add in a silk sleeping bag liner made by Cocoon, which supposedly adds 7-10 degrees in warmth, and if needed, will sleep in fleece layers. Sometimes I will wear my rain jacket and pants inside my bag, which create a vapor barrier that prevents moisture in my body from getting into the insulation of the bag.
For the very best in sleeping bags ($$$), check out Western Mountaineering, and Feathered Friends
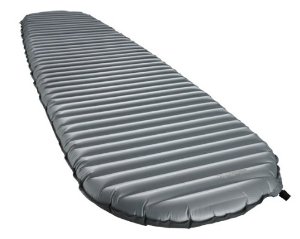
Neo Air Xtherm
Sleeping Pad - The sleeping pad is critical! It softens your bed, but most importantly keeps you warm. There are a few different types. Concerns again are weight, pack size, and warmth (R-factor). Never use open-celled foam pads, they're essentially sponges! Closed cell foam are the cheapest, and are fairly light, but they take up a lot of space. If you can cut them in half and make the halves re-attachable though (think velcro), you can store one half on each side of your stern wall, which can help keep heavier items from sliding to the stern of your boat and throwing your balance and trim off. For this reason I like closed cell foam pads like the therma-rest Z-rest. Closed cell foam pads keep you fairly warm with an R-factor of around 2.

Z Rest
Therma-rest's pro-lite and similar designs by Big Agnes used to be the rage, and still are for many folks. They are self-inflating pads that are reasonably light. If they pop, they still have some padding inside, but are heavier, bulkier, and not as warm as the new Neo-Air series by Cascade Designs.
Cascade Designs' Neo Air series has changed everything. They're pricey, but the best call in my opinion. Nothing packs up smaller, is lighter, and warmer than the Neo Air Classic and X-therm. The only risk is if you pop them they're done. They come with a patch kit though, and after over 100 nights sleeping on mine, it's still holding it's air. The Classic has an R-factor of 3.2, but the X-therm, which is my favorite, has an R-factor of 5.7! and it's still incredibly light and compact. If you have wide shoulders, are bigger, or simply like to have a little room, they make a big array of sizes with wider and thicker dimensions.
Pillow - I usually forgo the pillow, and use any spare clothing under my head, or even put some drybags under my sleeping pad to elevate the pad under my head. If you have to, Sea to Summit makes a tiny, light, inflatable pillow.
With the right shelter, groundsheet, pad, and bag, you can spend the night on any paddling trip and get a good night's sleep. Let's move on to the next need, Warm/Dry.
WARM/DRY
I need to be warm, dry and comfortable both on the water, and at camp. I also need to keep my equipment dry.
DRY BAGS
First off, to keep your equipment dry, you must have drybags. You'll need roughly 50 Liters of storage volume, give or take, for a 3-day winter trip. You can meet this need in a number of ways. Not everything needs to be kept dry, but your sleeping pad (if it's not closed cell foam), sleeping bag - most critical, shelter, stove, fire-starting materials and all clothing and toiletries should be kept dry. There are a few compaines out there that make decent bags, like Seal Line and Watershed. Seal Line's bags are not as quality, dry, or durable as Watershed, but the price difference is significant. There's something to be said though about buying it right the first time. Watershed makes the best dry bags on the market, period. The US Military contracts all their dry bag purchases with Watershed. They make two types that we're interested in:

The Chattooga is a bit bigger, though this photo doesn't make it seem so.
1) Duffel style - these are just small duffel bags. You can put them long-ways on each side of your stern wall and clip to the seat, or if you have the room, one can actually be mounted with its long axis perpendicular to the boat's axis, and right behind the seat. This accomplishes the goal of keeping things right behind your seat, for ideal weight distribution. We want to have as little weight at the ends of the kayak and the most at the center, to lower the effort required to spin the boat. Duffels are more flexible in application than stow-floats. You can use them as a nice hiking/camera bag, by just using a shoulder strap. I like to use a Chattooga to put my bag, pad, shelter and layers in, and if one bag is less accessible it will be this one, since I just need it at camp. Then I'll use an Ocoee or another Chattooga to put lunch, camera, gloves, hat, toiletries, and any other things I might need during the day in, and I'll store it in a more accessible place. There's nothing worse than needing something in the drybag that is least accessible, or having lunch/side-hike items spread out between two different bags. Not only are we packing based on weight distribution for paddling performance, but also for convenience of access to gear when we need access to it. One note on the duffel-style - you've got to squeeze as much air as possible out in order to fit them into the stern, which can be a little bit of work. If you have to do this, they also aren't going to provide a large amount of floatation in the event of a swim (they still help). You can still stuff some small float bags in the stern behind the bags though.
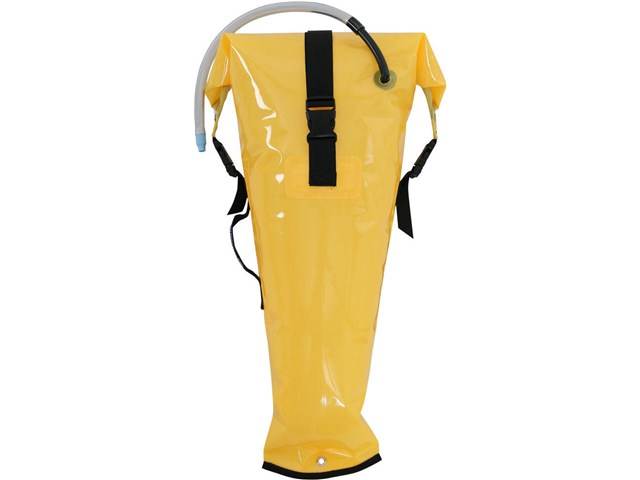
Futa
2) Stow-Float style - Watershed and a couple of other companies make this type of bag, which doubles as a float bag. Watershed makes the Futa, which is the standard stow float for the stern, and the Salmon, which is fatter and stores more, and can be put in the bow or stern. A nice feature here is that once your stuff is in the bag, there's an air valve just like in float bags, that you can open. Having the valve open allows you to squeeze air out of the bags to pop them between the seat and deck and then slide them into the stern. Once they're in, you can then re-inflate the bag to top off the floatation, which also helps lock the bags into the boat. These bags aren't as useful out of the boat, like for hiking with, as a duffel-bag, but they're great at what they do. Even if you have two Futa's, I recommend having an Ocoee to put lunch, hat gloves, and the like in, for quick retrieval. One other consideration is to pack the Futa's with the lightest stuff first, or deepest into the bag. That way, when in the boat, most of the heavy stuff is kept closest to the seat, reducing swing-weight.

Seal Line
Seal Line's bags are no doubt way cheaper in cost, and still work fairly well, for a while. I've just found they don't last as long as watershed, don't seal as definitively, and the bags are harder to keep clean. They also, if not perfectly rolled tight, can leak. The price is hard to resist though, and with care, you'll get your money's worth. Watershed's zip-lockesque seal ensure a dry seal every time. Aquaseal bonds very well with Watershed's material as well. I'm going on 10+ years on some of my watershed bags.
The downside to both Watershed and Seal Line is that they are heavy. However there has yet to be a light AND durable dry bag come to market. Until that day, it's worth the weight to have a Watershed. I will occasionally use REI or Sea to Summit's ultralight, inexpensive drybags for something non-crucial, but they're better for backpacking than the abrasive environs bags encounter on the river, and may only last 5-10 day trips on the river. Still, maybe that's a good place to put meals that are in freeze-dried packaging, pots, utensils, and other items that don't have to stay dry, and do it without breaking the bank. Just bring some Gorilla Tape in case you have to repair some tears/holes! And for packing your spork, or other sharp items, make sure they're padded/wrapped up so they don't damage your dry bags, or other sensitive items.
DRY SUITS - In the winter/spring, even in the southeast, the dry suit is one of the most important pieces of gear you'll own. It keeps you warm and dry in unexpected conditions, whether swimming or in your boat, and makes you MUCH more useful to your friends should a rescue be needed. It's part comfort, part safety, but when it comes to overnight paddling, it's even something more, helping make your paddling base-layers work double-duty as dry camp-wear for once you pull over for the evening.
Dry suits are nothing to skimp on with price, but you can get great deals on occasion.
I'm personally a big fan of Immersion Research Dry Suits. They are more reasonably priced than Kokatat, and while they don't have "Gore-Tex" they have their own proprietary "breathable membrane" fabric, that I've found does a great job of breathing out moisture. Gore of course wants folks to think they are the only "real thing" but this simply isn't the case anymore. IR's Arch Rival is very dry and incredibly durable, and their 7 Figure is a little higher end, with fabric instead of latex booties, and rear-zip, as well as a smoother, less rugged fabric. The 7 Figure seems lighter as well. The new Devil's Club suit by IR puts a focus on durability, and looks like a great suit as well. You'll be tempted to get other brands of drysuits. Some have proven well, from manufacturers like Sweet, or Palm, but read reviews on not just quality but customer service. If you're going to spend at least $700 on a drysuit, skip the run-around and go straight for IR, or if you have money burning holes in your pocket, Gore-Tex from Kokatat. The customer service with either of these options is just as critical as the product itself. I've found IR's customer service tops them all by a long shot, as you're serviced by East Coast paddlers who are just as fired up about kayaking as you are, they are very reasonable on repair costs, and the gear is great!
Kokatat is a good option with a caveat. Get Gore-Tex! Kokatat is known for their great warranty but only when it applies to Gore-Tex. This is because W.L. Gore requires companies who use their material to offer lifetime warranties on the garment. If you get a suit from Kokatat not made with Gore-Tex, expect less help if the suit starts to have problems. In short, if you're going Kokatat, get the Gore-Tex Meridian suit.
Union Suits - IR makes wonderful union suits. They make two different ones - I have both, and they each have ideal purposes.
Their standard is a thick, warm fleece material that is VERY warm. If you're doing a float-trip in the snow, this is your suit! However, you can get hot very easily, so if you're going to be shredding every eddy, for hours on end, expect to get soaked with sweat. Breathable fabrics can get rid of some of the sweat, but don't have unrealistic expectations of how much moisture they can get rid of. Also, the more water you have on your suit more of the time, from continuous whitewater, lack of sun, and a worn drysuit, the less the breathable fabric can work. Many folks think their drysuits are leaking when they are actually just sweating a lot. In this case, taking breaks and rolling over to cool off actually keeps you drier.
IR has a new union suit called the K2, which is much thinner, and has fabric ridges that raise the suit off of your skin, which greatly expedites dry times, both while wearing in the drysuit, and at camp. Unless I'm going out in really cold weather, or am going to be sitting for a long time, I use this suit most. It's my winter work-out paddling suit, that keeps me warm, but breathes well and helps me not sweat so much, and dries faster when I do.
Dry Suit Double Duty! - Again, it's great to pull into camp with dry under-layers. This is a whole set of layers you don't need to bring in your drybag.
CAMP CLOTHING
Now let's look at what kind of clothes we need to bring to stay warm and dry at camp.
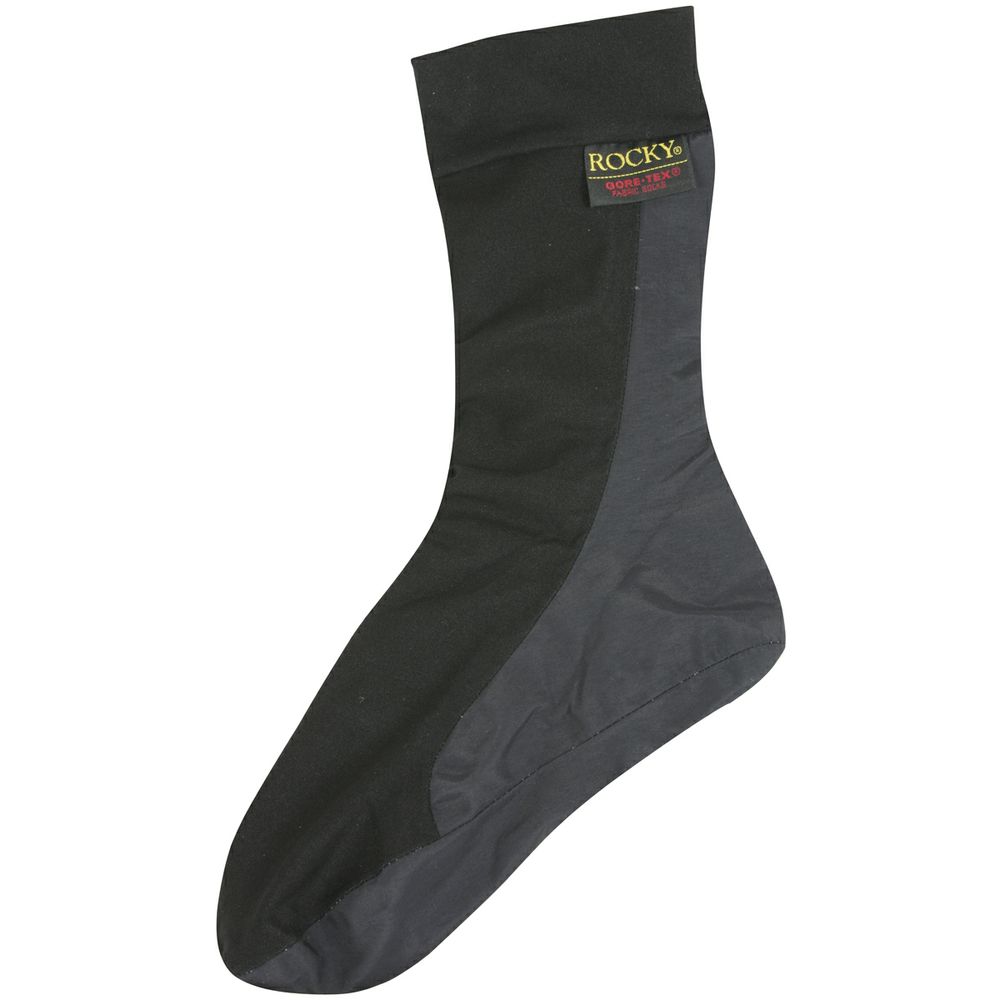
Rocky GoreTex Socks - they're awesome!
A warm hat is crucial. Remember space is limited, so bring something compact. Just because it's huge and fuzzy doesn't mean it's warm. A skull cap for paddling works, assuming you keep it in your dry bag during the day. A thin, windproof ski-mask is my favorite, due to how many ways you can wear it. You can keep it just around your neck for a neck buff, pull it over your nose and mouth, or just your mouth, or just wear it as a hat, or as a ski-mask. Find a light, compact, warm one, and you're set! If sun is an issue, bring a broad brimmed hat that's fleece-line for extra warmth, or if it's going to be hot, just an old straw hat.
Gloves/Mittens - I've found that gloves are never as warm as mittens, as your fingers are separated. However, it's hard to turn your stove down to simmer with mittens on. The compromise is liner gloves with warm mittens on top. Mittens off for work, Mittens on for relaxation. I think it's the best of both worlds, but personal preference goes a long way here. Just remember to bring something adequate, and put it in your day-accessible dry bag with your lunch and camera. They're nice to have at any time, along with a hat.
Socks - Wool socks are where it's at. The key here is that even when they're wet, your feet can be warm and comfortable. Look for smartwool/merino wool. Consider a lighter sock to wear paddling/hiking, and a heavier one for lounging around camp and to wear in your sleeping bag on those really cold nights. You don't really need a pair for each day, though having an extra pair is nice. For a 3-day trip, I usually bring 2 pairs of socks.
Footwear for Camp - In the summer, you can get away with Chacos, Crocs, Sandals, Flip-flops, etc. But in the winter you need a good shoe. This is where the magic of the Gore-Tex sock comes in. Gore-Tex oversocks (Rocky makes the best ones - they're pricey!) go over your wool socks, and then you can wear your river shoes as your camp shoe. This saves you a pound of weight alone, and considerable space. Bringing two pairs of shoes, one for the river and one for camping/hiking, is a burden. The Gore-Tex sock keeps your feet dry in your shoes whether wearing your drysuit or not! If you can't afford the socks but still want to use your river shoes at camp, you can probably get away with using the bottom of two contractor trash bags instead. Just use rubber bands at the cuff to keep them up. By the way, what kind of river shoe do you have? Neoprene booties don't do much for you once you exit your boat. Try to use a real river shoe from manufacturers like Astral, NRS, or 5.10. Hiking in neoprene booties, whether for pleasure or emergency, is a chore. If you have to bring an extra pair of shoes for camp, try something small and lightweight, like a minimalist running shoe.
Base Layers - On any cold weather trip, never bring cotton - once the least bit wet, you're going to shiver from there on out. Bring synthetic mid-expedition weight layers made for hiking/backpacking. They keep you warm even if they're a little wet. A long sleeve top and bottom layer will do. Remember again, that if you're using a good drysuit and don't sweat much, you can use your union suit or whatever layers you had on at camp as well.
Rain/Wind Breakers - to keep that warmth in while at camp, you need a light rain jacket and rain pants. Waterproof/breathable is best. These layers keep your warmth in, break the wind, and keep you dry. Never get a jacket that doesn't have a hood! The extra weight is nothing, and it doubles as a hat, or an extra hat. Frogg Toggs Driducks are also popular and affordable. A cheap, non-durable option is a tyvek suit available in the paint section at your local hardware store. I used one of these on a portage in Black Canyon in Colorado where there was so much poison ivy it was the only way to keep it off of us. It works well in the rain for a few rainy nights, but will eventually wet through.
Coat/Jacket/Hoodie - That extra top layer sure is nice much of the time, and is something you might consider keeping in your lunch bag if you have the room. The very best route to go here, if you can afford it, is an ultralight down hoodie/jacket. Ultralight, super-compact to store, and incredibly warm. Make sure the baffles aren't too big, otherwise the down insulation will settle to the bottom of each baffle, and won't be able to evenly insulate your body. A hood is a no-brainer as well, making the jacket much warmer. These are expensive, but are perfect for the job. Some companies even make down pants and booties. Typically this isn't worthwhile until you get down below freezing. If opulence is your thing though, they're out there!
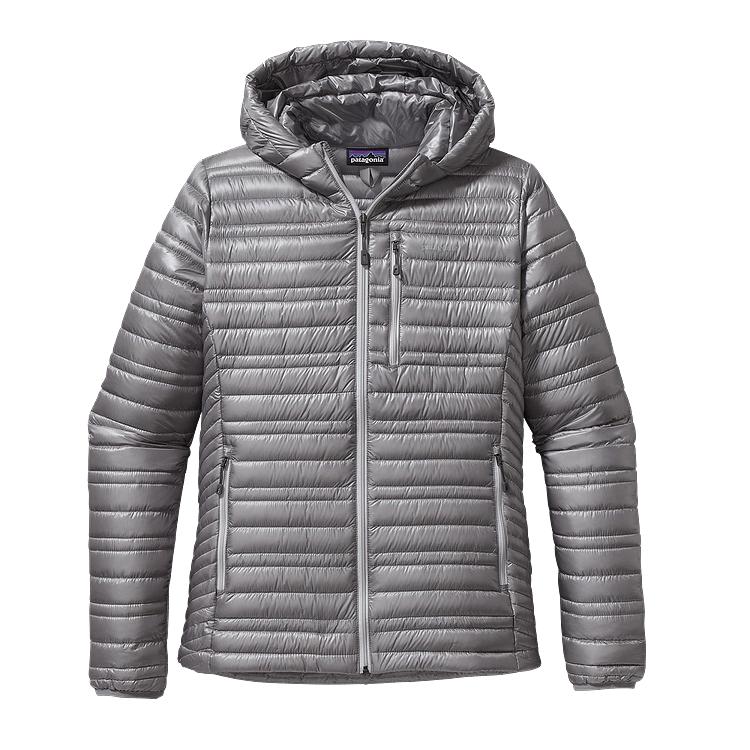
Down Hoodie
Finally, a tarp is awfully nice to keep your kitchen/hang-out area dry for habitation. Sil-nylon is the way to go here for its light weight and packability, but the old standard tarp can work as a piece of group gear.
NOURISHMENT/HYDRATION
I need to carry food for the trip, be able to cook it, and also have safe water to drink.
FOOD - There's many ways to go here. A rule of thumb some folks use is to have roughly 2 lbs of food per day, give or take depending on how much you eat, and also how much energy you'll need each day. Lunches tend to be quick, whereas at dinner you'll want to cook a hot meal to help keep you warm when it's colder. Breakfasts can range from bars and some dried fruit to oatmeal, nuts, pre-cooked sausage/bacon, and so forth.
Weight and space are at a premium, so avoid at all costs MRE's, canned goods, fresh fruit, or anything with water weight. The amount of stove fuel you'll need on your trip also is affected by the foods you bring, so make sure anything you're going to cook has quick cook/boil times of 5 minutes or less. You could do a little more than this, but the longer the cook-time, the more fuel you'll need to bring. If you have a food dehydrator (I don't have one....yet) you can really take the weight out of anything. You can even dehydrate your own sauces, and then re-hydrate them later when cooking. You can obviously take this as far as you want, but just remember to keep it light! When looking at any cookable foods, I like to try to find items that have at least 100 calories per carried ounce of weight. This ensures that I'll get a good amount of energy out of my food. Any food that requires boiling water means that we can just boil water collected from nearby streams to cook with, since we'll be treating the water through the boiling process. This saves our carried water for drinking only, and lowers the amount of water we have to carry and treat.

Freeze-dried backpacking meals - These are a great option, and can be bought at any outdoor store. Companies like MaryJanes Farm, Mountainhouse, Backpackers Pantry, and Alpine Air make good options. The choices are lavish, with all kinds of appealing flavors and culinary styles. They usually come in a vacuum-sealed package that you can eat right out of, so you don't have to do dishes, just lick your spoon clean. They're very light and compact, full of calories, and convenient. The downside is that they are very expensive compared to other options. They also have lots of preservatives and can hit your gut just a little if you're not used to them. This is not to discourage, they are a great option, with variations for breakfast and dinner. For a total of around $30 or less, you can have all the breakfast and dinner you'll need for a 3-day trip. All you have to do is add boiling water.
Putting meals together yourself - I have grown really fond of this method! It's way cheaper than freeze-dried meals, you can get creative, and you can get everything you need at any grocery store. One downside is that you'll be dirtying up a pot to put your food in, but I don't mind doing dishes, and the food can be a little healthier too. The basic idea is to get either pasta, rice, quinoa, or potatoes (these are all available as instant, ultralight little single-serve packages, MAKE SURE that the cook times are quick - rice is the trickiest, only get instant rice), and these will all come with some type of powdered flavor pack. Then you can get dehydrated veggies, or non-refrigerated meats like bagged chicken (located next to the packaged tuna) salmon, or tuna to make it more interesting. There are so many different combinations. One of my favorites is to get Annie's parmesan shells, throw in bagged chicken, and then a little plastic cup of green chiles for a savory, spicey meal that will keep you warm well after you've washed your dishes. Latin style rice dishes, add in a little bacon, there are lots of options. On the first day of a trip I sometimes am decadent and bring a small steak that I fry up in my pot lid. Some pasta recipes might require a little butter or powdered milk to enhance the flavor. I bring these items in tiny one ounce containers just to spruce up dinner. Because our temperatures in the Southeast will be refrigerator-like for winter trips, perishables keep fairly well. If you go for some packaged rice dishes, make sure they require adding water as opposed to already containing the water. Remember, there will be water everywhere, so no need to carry it with us and take up precious space.
Repackaging - This is crucial! Especially if you get your food from the grocery store! Some things are already conveniently packaged, but in some cases we need to repackage to get weight and space down. A box of mac&cheese for example, needs to be dumped into a ziplock sandwich bag. If you need the directions for cooking, you can always cut them out and put them in the bag. No need to repackage freeze-dried meals, though sometimes they have a lot of air in them, which robs you of vital space. If this is the case, poke a hole in them with a needle, purge all the air, then cover the hole with a little duct tape.
Standard 3-day/2-night trip - You'll need:
Two Breakfasts
Three Lunches
Two Dinners
Extra Food - It's possible that one lunch will either be just before you put on, or right after you take out, depending on the length of your days. If this is the case, then you'll have an extra lunch. So if you plan on having three lunches, you'll likely have a little extra food at the end. Conversely, it's good to have an extra meal just in case you experience the unexpected.
Variety - Try to avoid eating the same thing for many meals. Variety is the spice of life! Plus I'd rather dislike one thing and have something different the next night, than to eat the same thing every night whether I like it or not.
Minimize Stove Time - Keep the cook times to a minimum! Less cooking = less cooking fuel
Here are some convenient foods for each meal:
Breakfast - Oatmeal, Cream of Wheat, Grits, Instant Pancakes, Pre-cooked sausage or bacon, breakfast drinks - tea, coffee, cocoa, cider, breakfast bars, rice, pudding, dried fruit, nuts, fruit leathers
Lunch - energy/protein bars, cheese, cured meats like salami, sandwich bread - get the rounds, they hold up much better than normal sandwich bread!, tuna/salmon, pretzels, crackers, single-serve guacamole packs, summer sausage, dried fruit, nuts, etc. (remember that you'll need to carry at least one lunch in your accessible dry bag each day so that you don't have to dig for it when you break for lunch)
Dinner - instant drinks like cocoa, cider, tea, coffee, rice dinners with meat and/or dried veggies, pasta dinners with meat and/or dried veggies, cured meats, cheeses, freeze-dried meals, instant potatoes, first night steak, quinoa, cous cous, dried ice-cream, chocolate, pudding, nuts, dried fruit
STOVES/COOKWEAR
There are many different types of cook-systems, from liquid fuel stoves to gas canister stoves, to alcohol stoves to simply cooking over the fire. Let's look at the ups and downs to these systems.
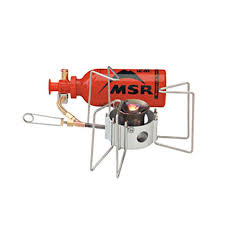
MSR Dragonfly
Liquid Fuel Stoves - If you're on a Himalayan expedition, these are the best, as they operate in almost any conditions. They simmer well, but also boil water quickly. The downside is the fuel is a little heavy, and spills can be a real mess. The stoves are also heavier than canister stoves and alcohol stoves. For our purposes, if you already have one and are happy with it, this is fine, though you may want to consider sharing the load with one other person and sharing the stove.

MSR Pocket Rocket
Gas Canister Stoves - For around here, and temperatures above 25 degrees, I prefer these stoves. They are cheap, incredibly light and compact, and still simmer with proper attention, while boiling water pretty quickly. These stoves meet the demands of whitewater overnighting the best, as long as the temperature doesn't stray too far below freezing. Compressed gas loses it's pressure at very low temps, making a liquid fuel stove a better option, but we're not worried about that. These stoves aren't quite as fuel efficient, and can't be enclosed. The only other downside is the waste of unrefillable gas canisters. You'll want to store the canister in your sleeping bag if it gets cold, keeping the canister warm for better performance. MSR, Snow Peak, and Jetboil make great canister stoves like the Pocket Rocket and Gigapower and Litemax. Jetboil is a favorite, serving as a complete cook-system. If you're only boiling water, and have another pot or freeze-dried pouch to put the water in, they're a great option. They are also more fuel efficient. I find the MSR and Snow Peak models more versatile, though they aren't quite as fast/efficient, and they're also cheaper than the Jetboil and don't require the proprietary pot that the Jetboil does. For price, flexibility in use, and compactness, I love MSR and Snow Peak.

Alcohol Stove
Alcohol Stoves - These stoves are incredibly light - you can make one out of a beer can that weighs an ounce. If made properly they can be fairly efficient. However you have no burner control, and cook times are longer, making the amount of fuel required to climb for multi-day trips. Further, I've found that they take a while to get going in colder temperatures. These are crude, ultralight options best for a quick one-night trip in the summer in my opinion. Still, folks love them. Make sure you're practiced with these clever, featherweight stoves.
Cooking over the fire - If you know you'll have a good fire, and are patient and don't mind putting in the work, cooking over the fire is the lightest option of them all! This may seem like a no-brainer, but given the fact of how light canister stoves have gotten, and the extra work of building the fire, sorting the coals, the delicacy of not boiling over when boiling water, the scorching and soot on the pots, and other inconveniences, cooking over the fire is often more romantic than practical. That said, on ultralight missions where every ounce counts, and you're guaranteed dry wood and a hot fire, it's not a bad idea. The likelihood of wet conditions, paired with the fact that most folks are going to want to stick close to the fire and will have their cook-set ups elsewhere, lead me to think this is not an optimum method for Southeastern trips. However, when doing summer trips in Colorado, California, and other dry destinations, I've often enjoyed cooking over the fire.
*When it comes to smores and brats, Feel free to cook over the fire!
COOKWEAR/UTENSILS

Snow Peak 47 oz Pot and Skillet Lid
What's it made of? That's the biggest factor that contributes to weight. Leave the cast iron skillet at home! Though titanium and aluminum cool quickly and technically may require slightly more fuel than heavier pots/skillets to cook with, their weight is the main appeal. Titanium is pricey but the best way to go. Snow Peak makes a 20 oz mug that's great for many meals, and a 47 ounce pot with a lid that can be used for cooking meats that covers everything else. Together they make a great cookset, though you can get away with just one of them. Add in a titanium spork, which is the best single utensil to have, and your river knife, and you have a complete cookset. If you only use a mug or the pot for boiling water, a small insulated cup for hot drinks will help you start sipping your drink while you boil water for your food. If this stuff is too pricey, a nice aluminum pot and a spork from home will work.
*hot tip - soap the outside of a pot/pan before cooking over the fire, it'll clean up with ease!
WATER
Ideally, I like to just carry drinking water with me on the river. If all the water I need for cooking will be boiled, I can get it from the river or a side-stream at or near camp. I usually expect to drink half a gallon of water per day, or two 32 oz Nalgenes full. Some folks drink way more or less than that. I will provide some extra water to help reduce the amount you have to carry, but if you have a filter/treatment system, or think you'll need one in the future, here's a rundown of the options:
Iodine/Chlorine Tablets - This is the lightest, cheapest, and simplest route, but the taste left by iodine is too much for some. Chlorine tastes better in my opinion, like city tap water, but both methods take a while, so you have to put in the effort to purify before needing the water, sometimes up to hours ahead of time. Another option is Aquamira's two-part water droplet system. The flavor is hardly noticeable, and it's a lot faster than iodine or chlorine tablets. Combine this with a filter and you have a complete set-up. Chemical treatment does nothing to actually filter particulates out of the water, which in areas of agricultural or mining run-off, means you'll need something else to filter the water as well. In areas of clear, clean water though, this is less of an issue, and chemical treatment kills much of the nasties, though recent studies suggest that they may have limited effectiveness at killing all Giardia and Cryptosporidium.

Filters - Pump/Gravity - Filters get rid of sediment, bacteria and protazoa, which is great, but they don't kill viruses. And if the water is very sediment laden, you'll need to let it settle before filtering, otherwise you'll clog your filter in a hurry! On the sections we'll be paddling, we'll have access to fairly clear water though, so keeping your filter flowing shouldn't be a problem. Just remember filters don't kill viruses, so some type of purification tablets, aquamira mix or other purification method is wise to use. Filters can be ran through pumping or gravity. Gravity filters can be useful, especially if you let them run during breaks or overnight. Pumps are more compact, but more complicated. I have an MSR hyperflow, which is a light, compact, fast acting pump filter, but take a look at the Sawyer Mini - this pump is only $25, super light and compact, and has a great reputation. You can even use it as a straw. The only drawback is that it will clog quickly if you are drawing up from muddy/sediment laden water. The solution is to draw from clear tributaries, which we should have access to. The Obed itself should be fairly clear unless just after a big storm.
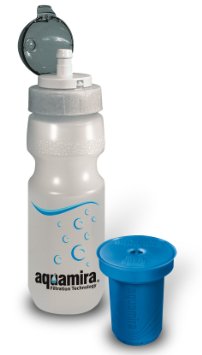
Water Bottle Filters - Bottle filters are great! Just scoop the water and then drink - the nozzle has a built in filter. These are great, but unless you're using the versions that also purify, you could still be subjected to viruses in the water. The filter/purifier combo is great, as it takes care of everything, though there will be some taste of the purifying agents.

Steripen in Action!
Steripens - What an ingenious invention! Steripens kill EVERYTHING! They don't filter out solids/particulates, mind you, but they take care of everything else. Steripens use UV light to kill everything in the water, over 90 seconds of use. Problems are the price, and the potential for failure, since they are electronic and run on batteries. That said, they are a great tool, particularly when traveling abroad to deal with inadequate water treatment standards in other countries. In combination with a filter, this set-up offers complete protection.
So how do you figure out which set up is right for you?
If you haven't gathered from above, we have methods that kill stuff, and methods that filter stuff out. So knowing the watershed you'll be in will help you pick the best method. If you're high in the remote mountains of the Western United States, you know the water is clear and clean, so filtering might be adequate. However if you're treating tap water in Mexico, you're not as worried about sediment as you are viruses and bacteria, so you need to purify. We'll be in the Obed or Big South Fork watershed, where we will absolutely want to purify, and filter as well. So we need a dual-treatment method.
So in addition to a filter, we need chemical tabs, the two-part liquid system, or a steripen. Or we can get a filter/purifier combo in either the pump or water bottle adaptation.
For a cheap, dependable option, I think that the Sawyer Mini and the Aquimira two-part system is the best option, costing a total of only $35-40.
**Water treatment equipment is also reasonable to share amongst the group. Not everyone has to have it. If you can swing it though, try to be self-sufficient in this regard, you'll learn more and know where you stand with regards to drinking water.
HEALTH/SAFETY
I need to maintain proper hygiene, stay healthy, and be prepared to take care of myself or my team in the event of a medical emergency
HUMAN WASTE - One of the leading maladies leading to evacuation on Grand Canyon river trips (Grand Canyon trips are the true test of your overnighting prowess) is illness due to poor hygiene. If you don't have proper bathroom etiquette and then cut up all the fruit for lunch, you may have 12 people reeling in norovirus and in need of a helicopter just a day or two later. Now luckily, we're all fending for ourselves with food, which minimizes cross-contamination from person to person, but a proper bathroom protocol should be in order to ensure good health for everyone for the duration of the trip. We'll need at least a few hand trowels for digging cat holes. The holes need to be sufficiently deep, and post-business burial is just as important. You'll need toilet paper, and maybe also a few wet wipes in a ziplock just in case. Hand sanitizer is a must, and luckily the little bottles they come in are just the right size. Wash your hands before handling any food and after using the bathroom. This time of year, when flows are high, the best option for urinating is to just pee in the river, but for some of us, that is a lot more difficult than for others. Safety is a concern, so head into the woods 100 feet or more if the river environment is treacherous at night. Don't endanger yourself! Men, or Women with the proper appurtenance, may elect to have a small 20 oz gatorade bottle inside or next to their shelter. That way you can just do your business and then dump it in the river in the morning.
FRESHENING UP! - No shower, no problem! They actually make big wet wipes that are for your body. Just bring a couple (don't bring the whole package, just bring what you need in a small ziplock). I usually don't need one for a three-day trip unless it's really hot. Also, I like the small containers of Gold Bond for staying fresh. If it's super cold and dry, I'll bring a tiny little hotel bottle of lotion to keep my nose and hands from cracking, and a stick of lip balm. A kid size toothbrush and a small paste tube, along with a mini-floss round out my hygiene kit. And don't forget the sanitizer! If it's super sunny, a little bit of sunscreen and sunglasses too. Just remember, all these little things add up. Don't be afraid to portion and re-package to cut superfluous weight.
DOING DISHES - Most dish detergents are terrible for the ecosystems we'll be paddling through, so I try to avoid doing dishes in the river. Freeze-dry eaters won't have many dishes, but even those of us who have a dirty pot at the end of the meal can make it work. Lick it clean! One method is to just clean it as best you can with your spoon or your finger (you washed your hands, right). Any time you boil water, put just a little bit of olive oil (I carry a tiny little one ounce bottle) in the water. This creates a relatively non-stick environment and makes clean-up easier. If I really need to scour, I cut off a little part of a sponge/scour pad and bring it on the trip. Then just rinse in the river. You can also use sand to scour, and leaves to wipe clean. If you have to use soap, get Camp Suds or Dr. Bronners, and use as little as possible. Use a small pack-towel to wipe dry/clean.
THE 10 ESSENTIALS!
We've all heard of the ten essentials, and we'll already have most of them anyway, but let's review the list. This list is from Freedom of the Hills, a mountaineering guide:

Victorinox Classic
Navigation - Have a map, a compass, and familiarity with the area. Homework on the front end is every important. You can skip those on our trip, since you have me :-)
Sun Protection - check
Insulation - check
Illumination - a good solid headlamp, with extra batteries. Size and weight are a factor. Black Diamond makes good torches at a reasonable price, from the Spot to the Storm.
First Aid - We'll have comprehensive first aid, but bring your own kit you normally have on the river. Meds are good too, such as an epi-pen, ibuprofen, aspirin, iodine for wounds, bandages, etc.
Fire - a good lighter, maybe a few birthday candles or utlralight fire-starter aids
Repair/Tools - I often bring a little bit of fishing line and a tiny tube of aquaseal. Tear-aid is useful for any inflatables and even kayaks, and a small screwdriver that works on your boat. Your river knife is also a tool. The small Swiss Army knife shown above is a wonderful tool to have, with scissors, a small but effective blade, toothpick, tweezers and file, all the size of your pinky finger.
Nutrition - check
Hydration - check
Emergency Shelter - check
On expeditions when you're REALLY out there, some folks carry a mini-survival kit in the chest pocket of their pfd, consisting of an emergency blanket, fire-starting materials, water treatment devices, etc. You won't really need this on some trips, but if you're ever in the middle of nowhere and lose your boat entirely, it's nice to have some stuff on your person.
RESCUE GEAR - You'll need a throw rope. Common thought is that if you have a rope you must have something readily available to cut it with, so a knife is also standard. Beyond this, training is essential for any other gear. It's not recommended to wear a rescue PFD if you haven't been trained on how to use one. A few carabiners are helpful, and you'll need them anyway to secure your drybags. Prussicks, webbing, pulleys and everything else are good to have IF you've been trained in swiftwater rescue. If not, bring your rope and a knife.
SHOES - Shoes couldn't be more important. Remember that when you show up with inadequate footwear, it's a disservice to everyone else, not just you. Support, traction, and comfort are all important. Show up with the right stuff!
REPAIR GEAR - For a kayaker in the wilderness, especially in less forgiving, more abusive terrains, you'll need some tools to repair gear in emergencies. For the hull, I use either bituthene or vinyl mastic to temporarily patch cracks. Bituthene is used by roofers, and vinyl mastic is used to insulate electrical bolts. Source thusly, and carry enough to patch a large crack. This will keep you running to the end of the trip. I use dental floss to sew any tears or holes in gear, and a small needle stuffed in mini-cell to do the sewing. Tear Aid is a strong tape that seals holes and tears very well. Aquaseal can be bought in tiny little tubes, perfect for an expedition. Finally I make sure I have a small screwdriver that fits my particular screw size on my boat.
GROUP GEAR
On most trips, there are items that not every person needs to bring, but instead can be split amongst the group for carrying. On heavily regulated rivers, particularly out West, groups will split up firepans and spare paddles, and extra lifejackets. We aren't held to such stringent standards in the south, and can run fairly self-sufficient, but here's a list of some group gear that would work around here:
Stove - I recommend everyone have their own kitchen, but if you can work it out, you could share a stove between two people, just be patient with each other!
Breakdown Paddle - not everyone needs to bring one, for a group of 12, 3 should be adequate.
Kitchen Tarp - a tarp for covering the cooking/hang-out area, even if not big enough to house everyone, is nice.
First Aid Kit
Water Treatment - If you're planning on making a habit of overnighting, you're going to need your own stuff. That said, if half of the folks in a group have treatment capabilities, and other half can share, that should be fine.
Maps, River Info - one person can carry these, although an extra map doesn't hurt.
Emergency Satellite Beacon - SPOT, InReach, and ACR all offer options here. Spot is heavily marketed and has lots of other fun uses for those watching online, but Spots have actually failed when it really counted. InReach does everything as well with more reliability. ACR is the most reliable, and after initial purchase, the cheapest to use as there's no subscription fee. ACR doesn't show your friends and family where you camp each night, but the Military will show up on time, so I think it's the best.
EXTRAS
If you've done a great job at minimizing your set-up to only what you need, and the most compact and lightweight, you can indeed splurge on an item or two. Don't get carried away, but if you have room you can bring the following:

REI Flex Lite
Camp Chair - I personally bring a chair any time I have room and can handle the weight. REI makes a great chair called the Flex-Lite. At under 2 lbs and very comfortable, this chair is hard to beat. Big Agnes and a few other companies make ritzier, larger versions, but the Flex-Lite is perfect when space is at a premium.
Musical instrument - obviously some limitations here, but the mouth harp is always a good call, IF you know what you're doing :-)
Book - bring a small book to read before going to be, or some literature/maps specific to the area to supplement the experience.
Frisbee - if there's room, an LED frisbee at night is fun. Just keep it out of the water.
Fishing Gear - at the Obed and BSF, fishing season is when the water is too low to boat. At least for this amateur.
iPod/headphones - sometimes music goes well with the experience. Putting your device speaker first into a pot or bowl makes a nice speaker, just be sensitive to the musical tastes of others. Many folks think it sacrilege to play the stereo in the woods. Chances are, there'll be several of those folks on your trip.
Climbing shoes - if you're a scrambler, there's lots of bouldering where we'll be. Just remember it's a long way to help and there's no room for a crash pad!
Alcohol - different areas obviously have different regulations. Check them before bringing the booze. Usually there's always some space for a bladder of wine or liquor, or a few high gravity tall boys.
Camera - I always am cautious to not get hijacked by my tendency to take lots of pictures, but it's the best way to remember the places we go. Double-duty for the phone that shoots pics and also plays music, and even serves as an emergency contact device in certain areas.
Notebook/Pen - Some of the most insightful moments of your life might be on trips like this. Jot your thoughts down so they permeate into your daily life, well after returning to the grind.
There's lots more to list, but you get the drift
Earplugs - if you're sharing shelter, or even just have a hard time falling asleep, these take up little space and can make a big difference.
MAKE SURE EVERYTHING FITS IN YOUR DRY BAGS, AND YOUR BAGS IN YOUR BOAT BEFORE YOU START ADDING EXTRAS INTO THE MIX!
GEAR LIST
Here's a list of what I am planning on bringing for myself on our trip:
Shelter - 5 x 7 tarp
Groundsheet - polychryo
Stakes - titanium, 6 of
Sleeping Pad - Neo Air XTherm
Sleeping Bag - Sierra Designs Zissou, 23 degree
Sleeping Bag Liner - if really cold, Cocoon Silk
Camp Chair - REI Flex-Lite
Dry Bags - 2 Watershed Chattooga's, 1 Watershed Ocoee
Ultralight Dry Bag - REi, $20
Layers - IR Union Suit, synthetic long sleeve top and bottoms
Underwear - SAXX performance underwear or running shorts
Socks - Two Pairs of Smartwool socks, one medium thickness, one expedition thickness
Gore-Tex Socks
Hoodie - Patagonia Ultralight Down Hoodie
Ski-Mask
Mittens - Very Warm Snowboarding Mitts
Liner Gloves
Ultralight, packable Rain Shell and Rain Pants
Headlamp - Black Diamond Storm, extra batteries if not sure how much is left
Kitchen Ground Sheet - 3 x 2 feet, polychryo
Stove - MSR Pocket Rocket with one new 8 oz. canister (8 oz is more than enough but extra just in case)
Lighter - Small bic lighter
Firestarter
Pot - Titanium Snow Peak 47 oz, with lid/pan
Mug - small blue NRS mug
Spork - Titanium Snow Peak
Butter - 1 oz.
Olive Oil - 1 oz.
Powdered Milk - 1 oz.
Hot Drink Mixes
2 dinners
3 lunches
2 breakfasts
Extra Zip-lock bags
Water Filter - MSR Hyperflow
Water Purification - Aquamira Two-Part Solution
Water Bottles - 2 Nalgenes
Cat Trowel
Toilet Paper - rationed amount
Wet Wipes - rationed amount
Pack Towel - small
Hand Sanitizer - small bottle
Soap - Camp Suds, small bottle
Small Custom Cut Scour Pad
Gold Bond Powder - small bottle
Lotion - tiny bottle
Lip Balm
Toothbrush - travel, breakdown
toothpaste - tiny tube
Dental Floss - tiny box
Sunscreen - tiny bottle
Sunglasses
Bug Spray - probably not necessary for our trips
Map of area
Cell Phone for camera, music, and emergency contact
Headphones
Aquaseal - tiny tube
Screwdriver - small
Sewing Needle
Vinyl Mastic - kayak repair kit
River Gear
First Aid Kit
River Knife
Throw Rope
Whistle
Small Mirror
Carabiners - Two Locking
Prussick, Webbing
Ultralight Fire Starting Kit
Drysuit
Adequate Footwear - Astral Brewers
Skirt
Helmet
PFD
Paddle
Pogies
Breakdown Paddle
Boat
Group Gear
Kitchen/Hang-out Tarp
Some community water
Garbage Bag
Back-up water treatment - Chlorine Tabs
WHAT I BROUGHT ON A QUICK ONE-NIGHT TRIP WITH LOWS IN THE LOW 20'S:
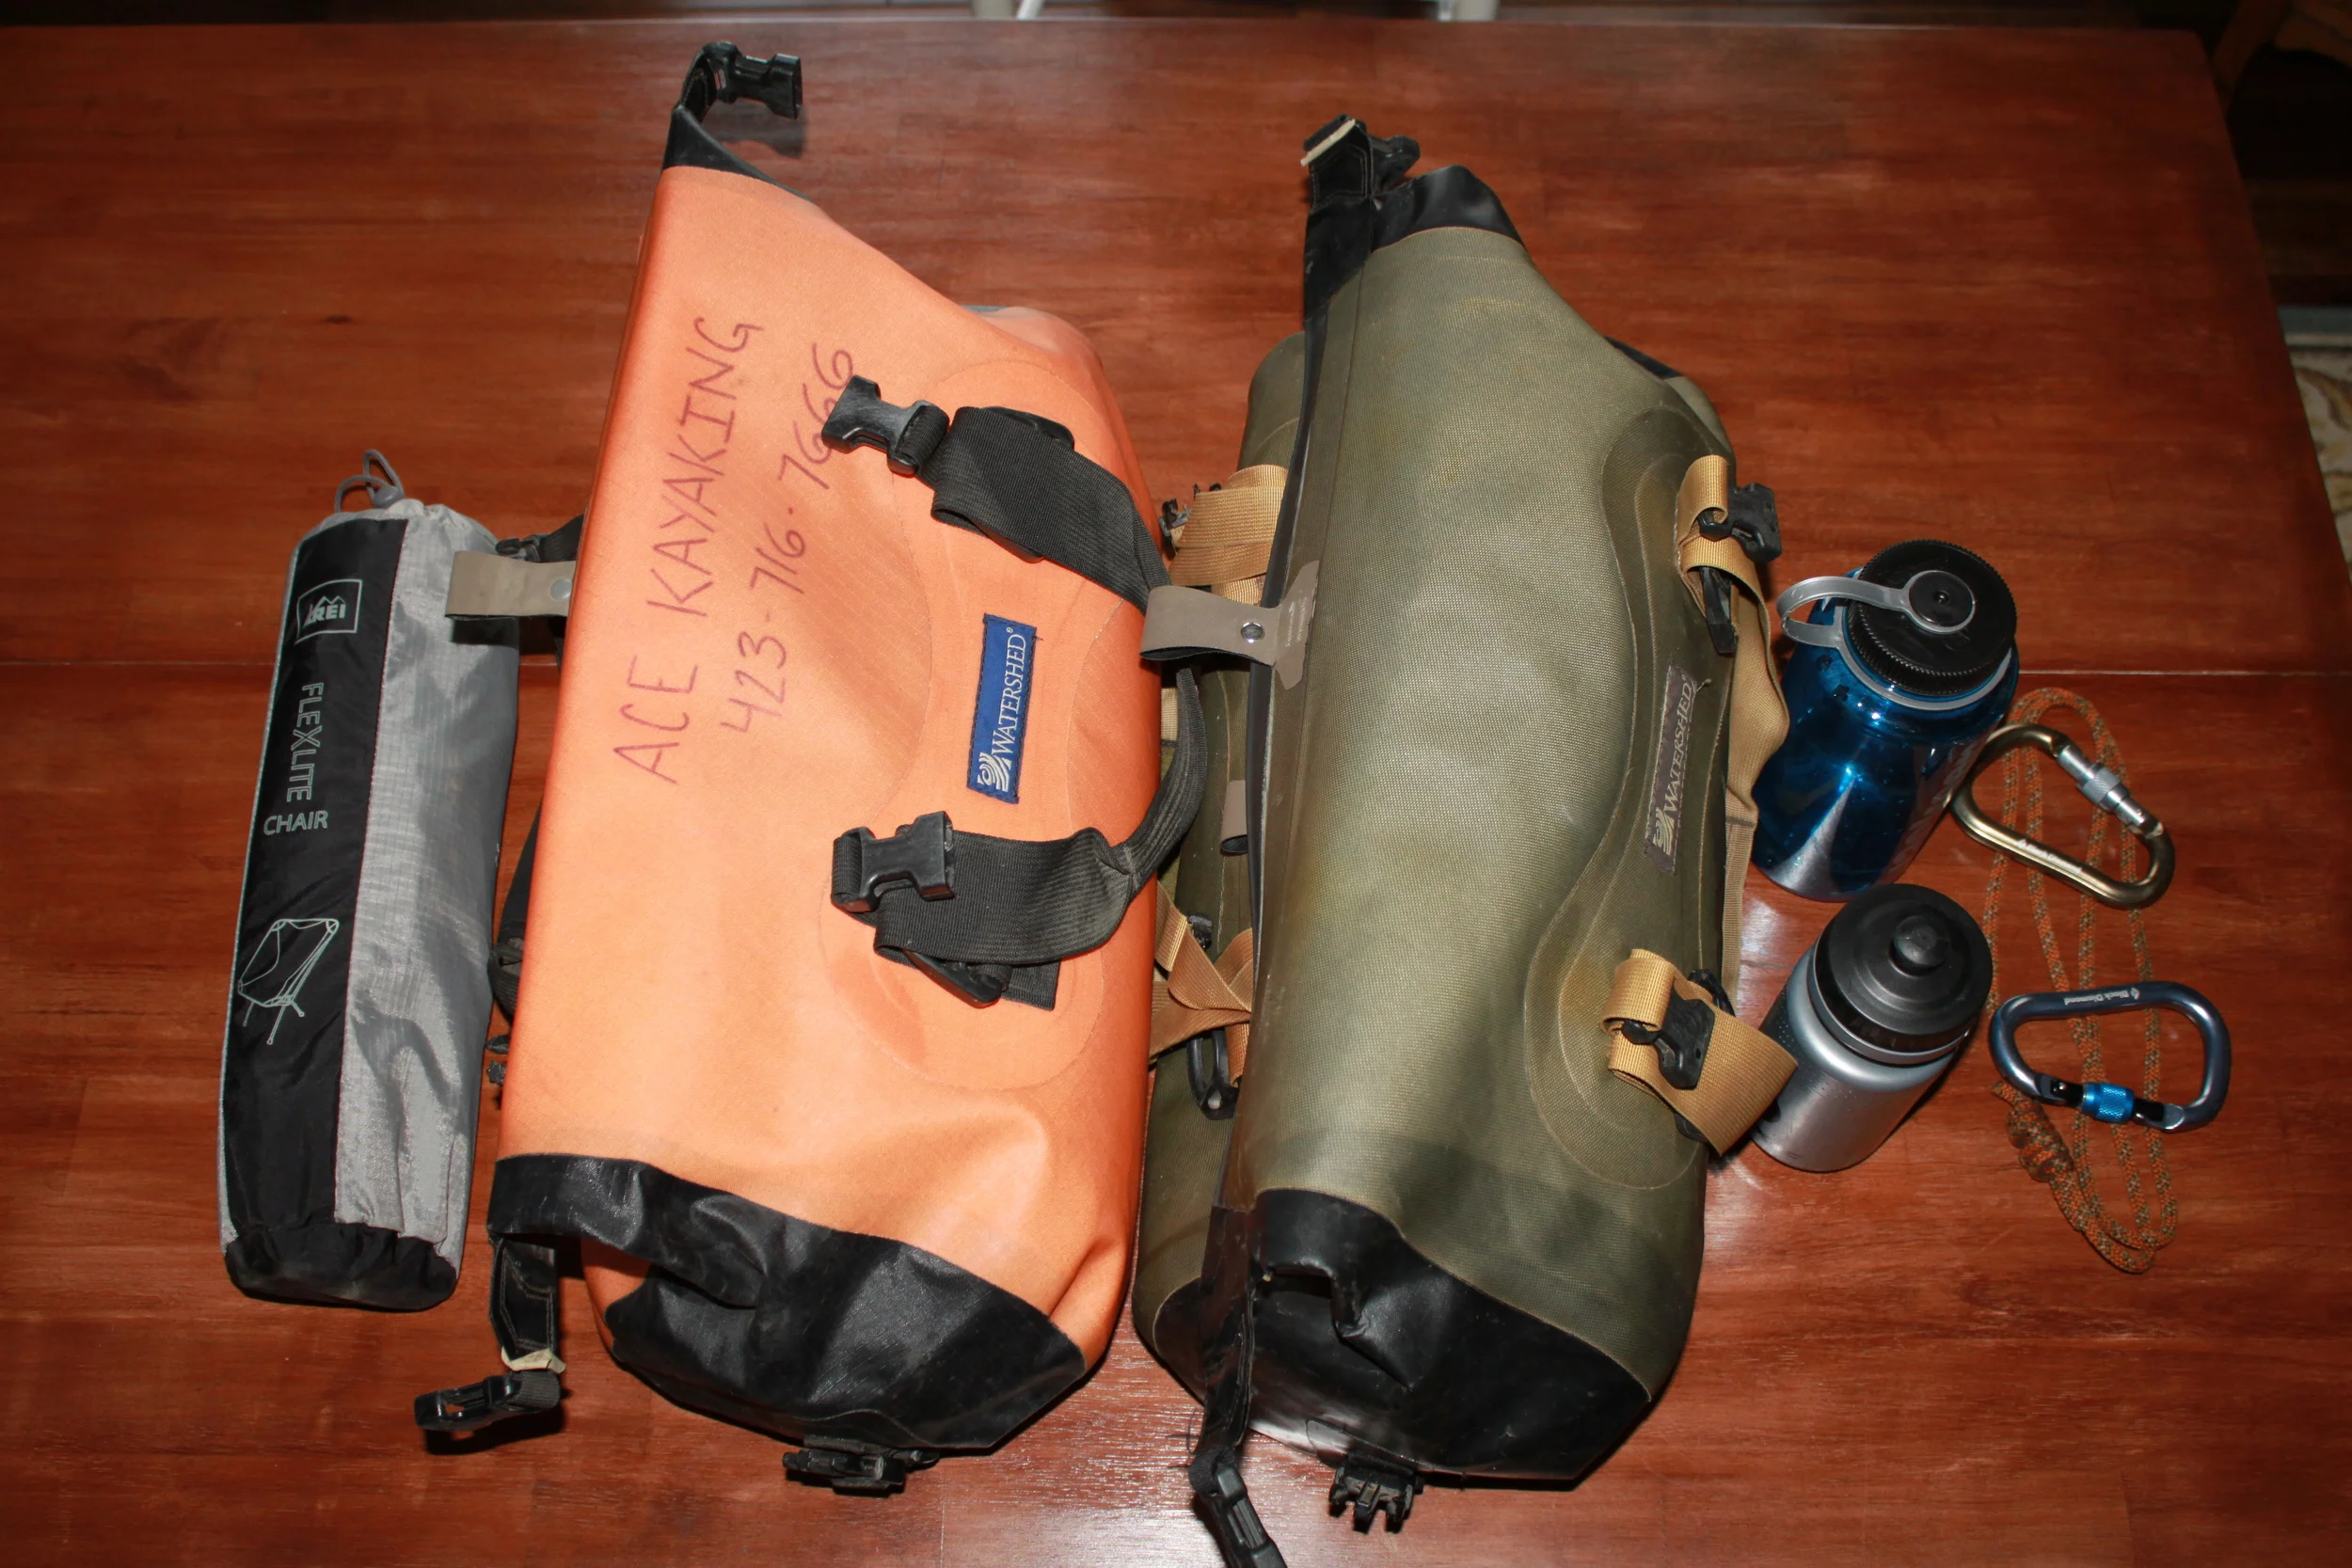
This is my base-level winter kit. Two Chattooga drybags, plus water bottles, and my luxuriant chair!
Everything I had pretty much fit in the two Chattooga bags, which is a pretty ideal set-up. I just put the chair behind my backband and made sure it was clipped in. The total weight of all that you see here is 17.2 lbs. The only thing not in here is my layers, which I wore under my drysuit, water (the bottles are empty), and my food. On this quick trip all I brought was dinner and breakfast. Add another pound for my pasta, dried sauce, peppers, powdered milk, a little butter, coffee, hot cocoa, oatmeal, and nuts for the oatmeal, and we're just over 18 lbs total for one night. If you figure around 2.5 lbs of food per day, which is a lot, you'd still be at only 25 lbs with this base-weight.
Here's a breakdown of everything in these bags, minus food:

17.2 pounds - Can you say FREEDOM!
Dry bags
Sleeping Bag 20 degree, 700 fill, 2 lbs
Sleeping Pad - Thermarest XTherm
Stakes and Polychryo groundsheet (don't have to bring stakes, can use sticks. I felt like pushing the easy button this go around)
Silk Bag Liner - supposedly adds 7-10 degrees warmth. (Results May Vary)
Tarp - Integral Designs Siltarp One
Tiny Pillow - sea to summit - you usually can make a pillow from spare stuff-sacks, etc, but with this trim kit, I felt like bringing it.
Chair - REI Flexlite
Something to read
GPS, Maps, Music, Books, Emergency Contact
Headphones - helps me fall asleep sometimes
Water Filter - MSR Hyperflow - I used karst springs, so forewent chemical treatment
Titanium Pot - Snow Peak 47 oz. with lid
Coffee Cup
Spork
Butter - makes it taste better, makes clean-up easier
Powdered Milk - makes everything taste better, more filling
Gas Canister - 4oz.
Stove - MSR Pocket Rocket
Lighter
Down Hoodie - Patagonia Ultralight
Snowboarding MIttens -
Rain Shell
Gore-Tex Oversocks/booties
Rain Pants
Ski Mask/Buff/Hat/Scarf/Nose Warmer/Ear Warmer
Toilet Paper and Paper Towels
Wet Wipes
Emergency Kit carried in PFD in event of boat loss - flashlight, water purification tabs, lighter, fire-starter, cell phone
Headlamp - Black Diamond Storm - it's waterproof, and has red light, which doesn't kill night vision
Nalgene - 32 oz. - for camp water
Water bottle for drinking while on the river
Carabiners to strap the two dry bags into the boat behind the seat, one on each side of the stern pillar
Prussick - used for rescue, but great for any use - I used it to hang my food bag in a hemlock out of reach of raccoons
Bag of little things - toothbrush, toothpaste, floss, lip balm, gold bond, lotion for dry skin, hand sanitizer, camp suds, small knife, etc.
Breakdown of food for a 3-day/2 night trip

3 days of food - not too bad eh?
In the above photo, you can see that if done correctly, 3 days of food doesn't have to take up much space. Below is a description of what you see in the picture:
Mixed Nuts - to accompany lunches, or just for quick snacks
Deserts - for lunches or dinners - in this case, girl scout cookies
Olive oil, butter, and powdered milk - for making clean-up/cooking smoother, and to make things creamy!
Dinner 1 - 8 oz Top Sirloin and instant mashed potatoes (for the first night's dinner)
Lunch - clementine oranges, ritz crackers, 4 oz servings of cheese, and tuna
Breakfast - Three oatmeal packets per breakfast, with crushed pecans and raisins, two coffee packets per morning
Dinner 2 - Annies parmesan spirals pasta, chicken in a bag, green chiles - mix it all together and you have a huge meal
REMEMBER TO ENSURE CLEANLINESS AND FUNCTIONALITY OF ALL YOUR GEAR BEFORE THE TRIP. THIS INCLUDES MAKING SURE YOUR COOKING RECIPES WORK, THAT YOUR SHELTER SYSTEM IS FUNCTIONAL, WATER FILTERS ARE CLEAN, STOVES ARE FUNCTIONING, AND THAT EVERYTHING FITS IN YOUR DRY BAGS, IN YOUR BOAT, AND THAT YOUR BOAT STILL FLOATS!
WE SHOULD BE ABLE TO GET OUR TOTAL WEIGHT OF ALL OVERNIGHT GEAR AND BAGS DOWN TO 25 LBS OR LESS FOR 3 DAYS.
IF you'd like to arrange a custom clinic designed to develop your skills and confidence to where you can forge into self-support whitewater trips for yourself, please reach out and we'll make it happen!
THANKS!
Kirk

photo by Jim Janney